Image by Jessica Marquez
cat bandana
Instructions:
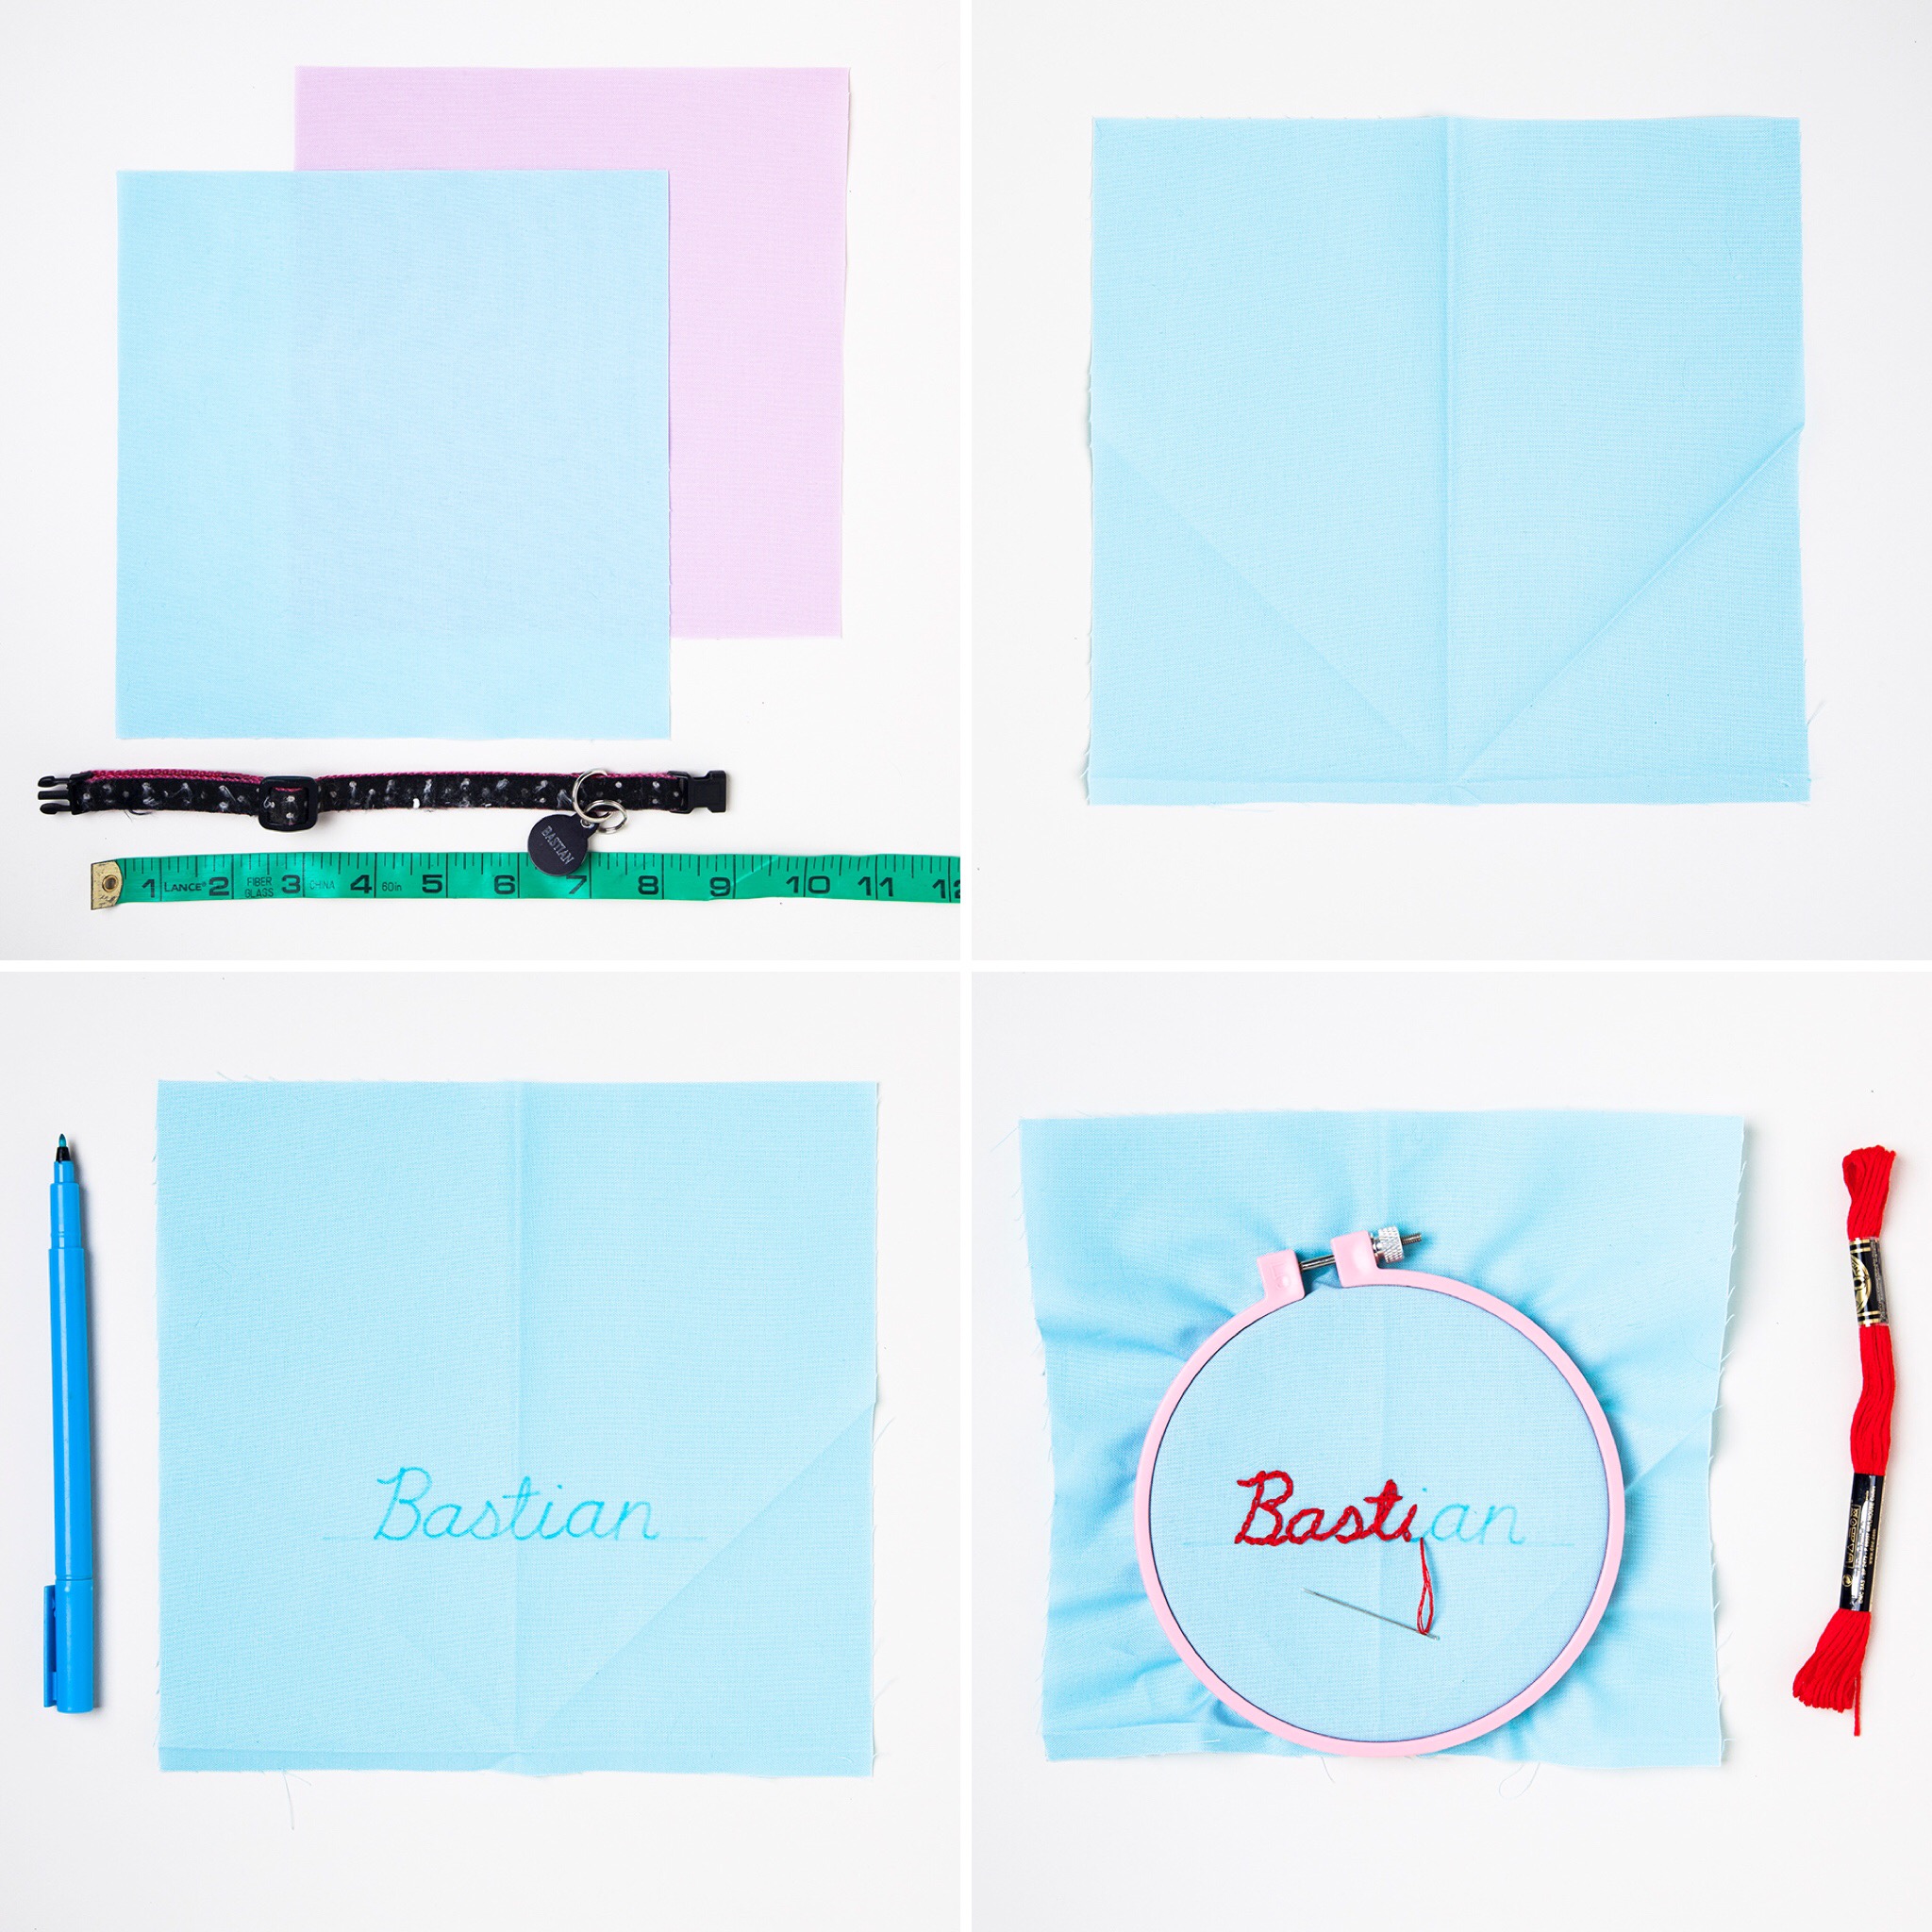
1. Measure the length of the cat collar between the safety snap. This will be the length of the bandana. The width is 8”. Cut two pieces w x 8”.
2. Fold the bottom seam 1/4” and press on the top layer. Fold the fabric in half and lightly press to mark the center. Fold the corners to meet the center seam to create a triangle. This will help you visualize where to stitch on the bandana.
3. Use a water soluble marker to write the name and stitch with 3 ply embroidery floss in a chain stitch on the top layer of fabric. Once you’re finished stitching, remove any remaining water soluble pen with a damp cloth.
4. Cut along the the triangular fold lines with a 1/4” seam allowance on both layers of fabric. Pin the right sides (stitched name should be backward) of the fabric together.
5. Sew with a .25” seam allowance around the bandana leaving 1.5” opening. Pull the bandana through to the front side, push the corners out and press.
6. Turn over the bandana. Fold the corners down and pin in place. Sew ⅛” seam around the top of the fold and the triangle. Lace collar through and pop that collar on!
Image by Jessica Marquez
DOG bandana
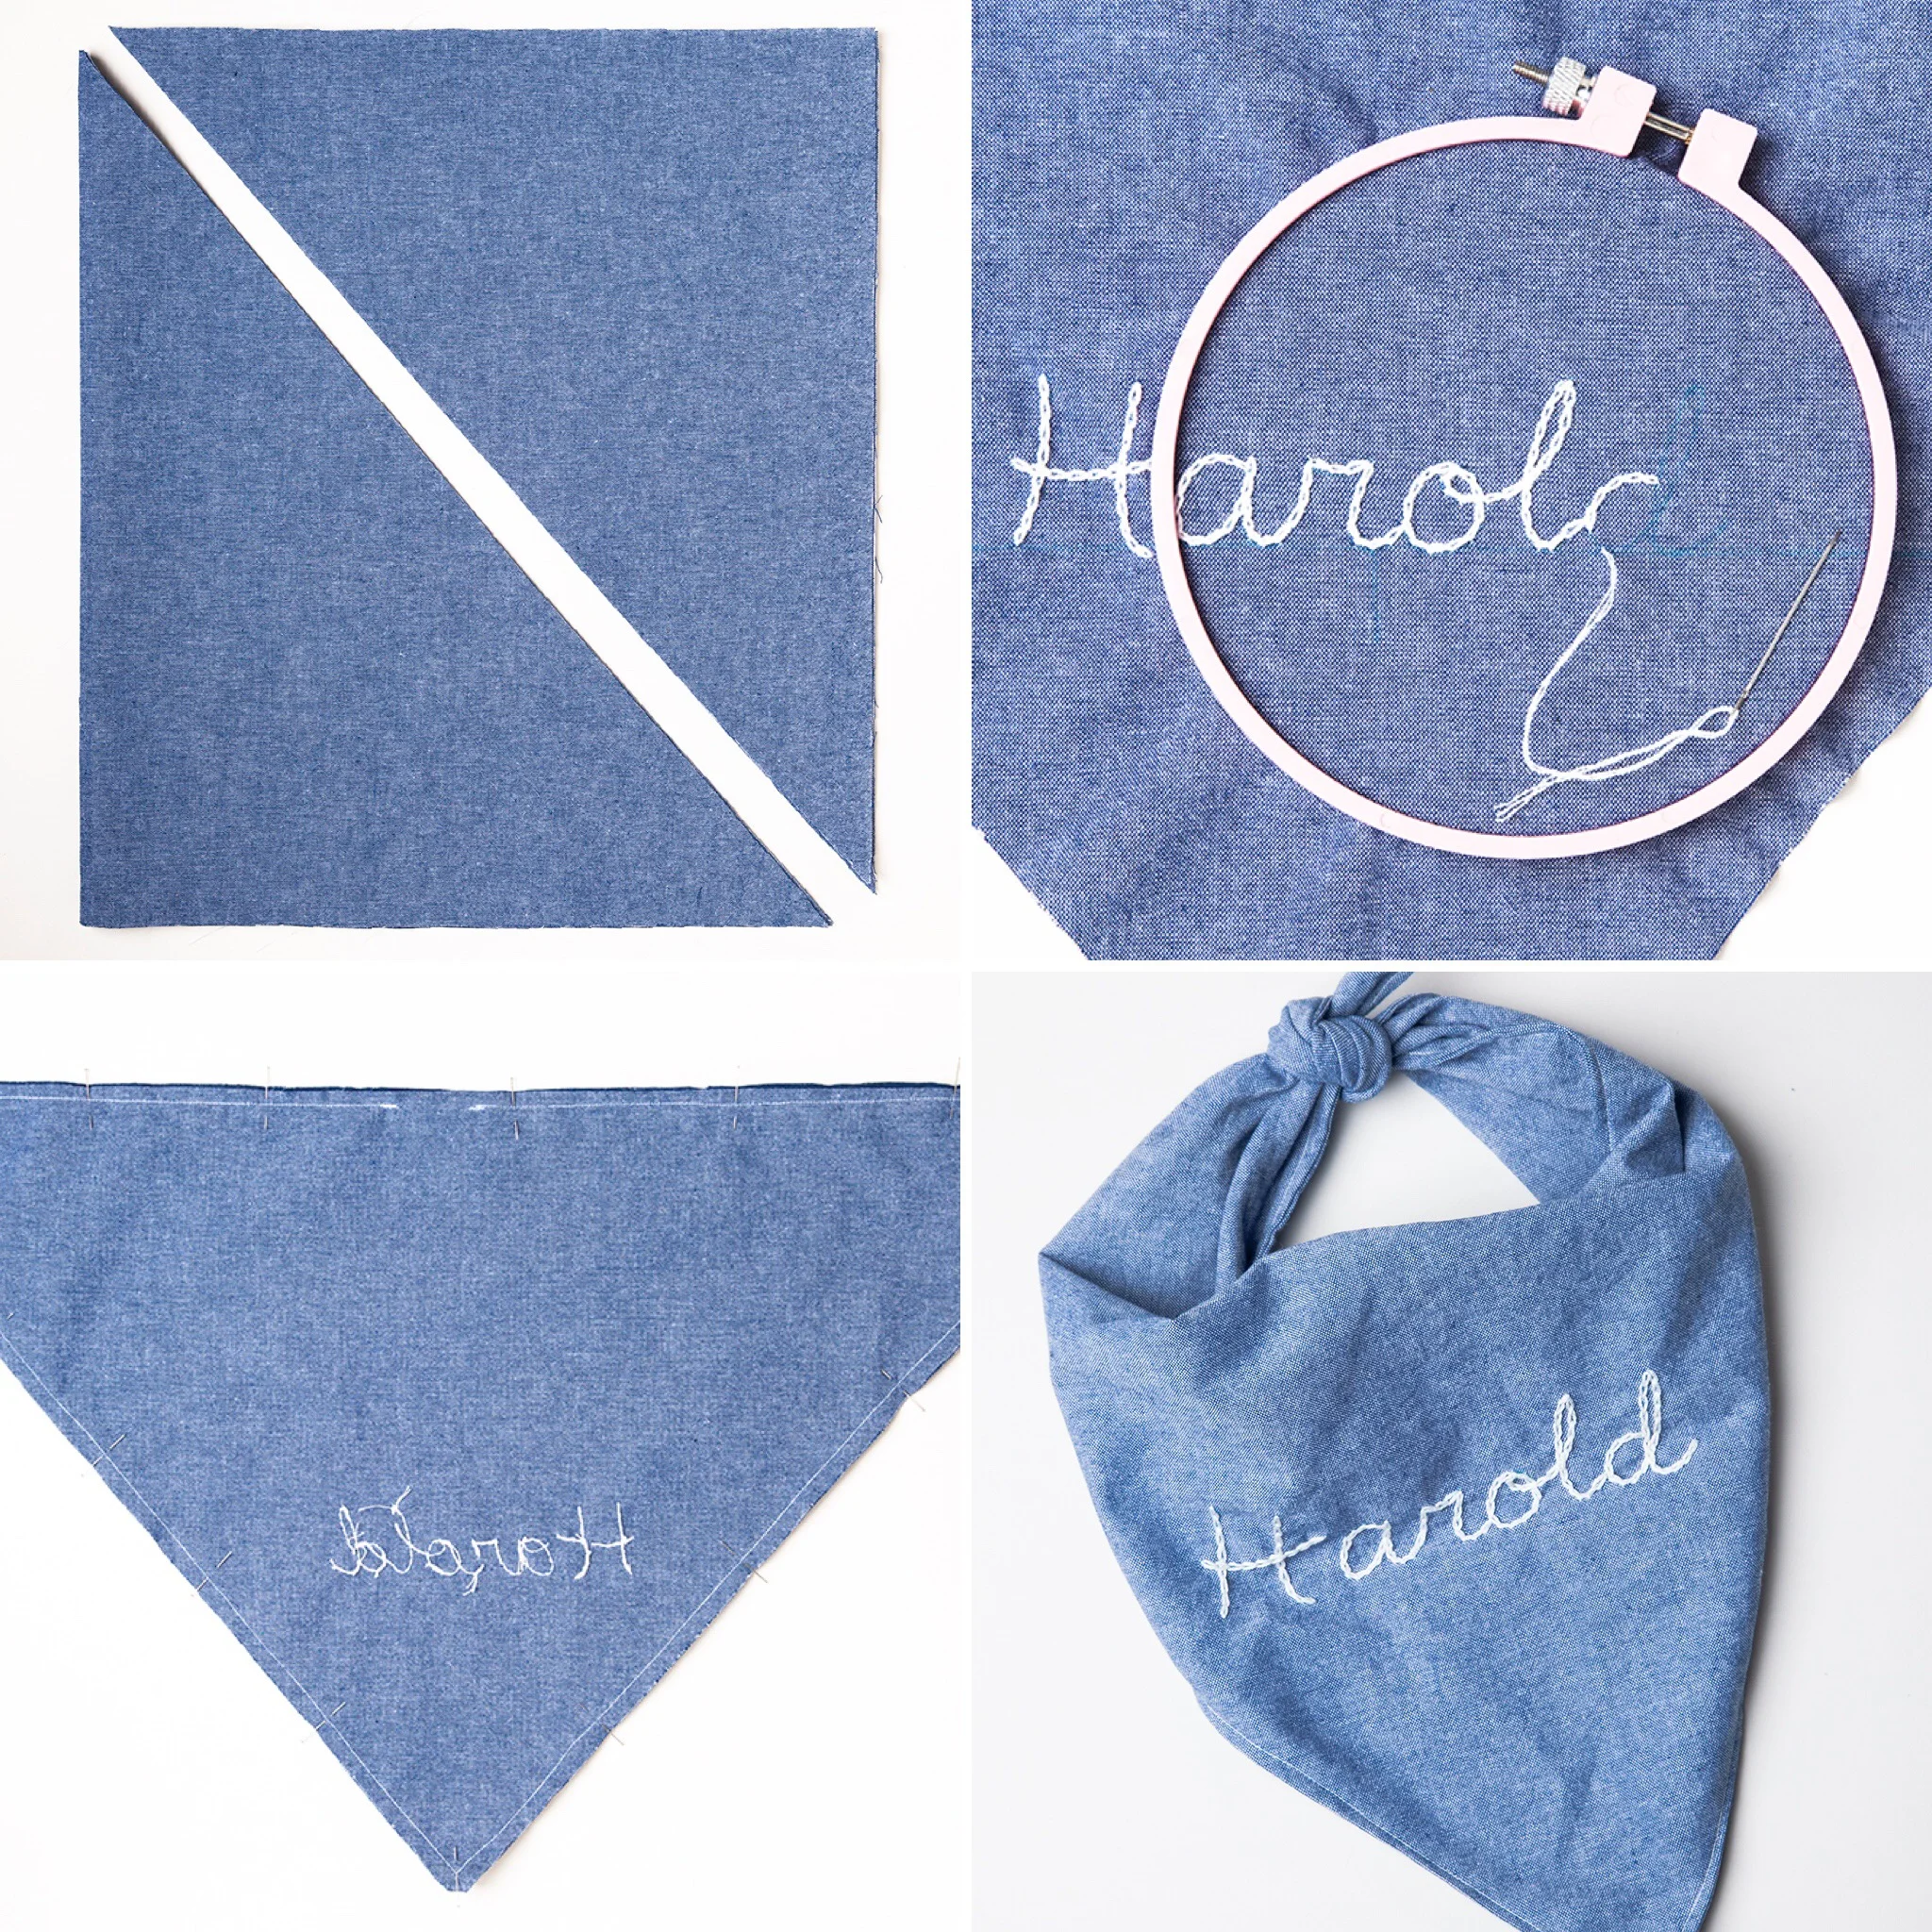
1. Measure the length around your dog’s neck and add 10-12”. 10” if you want short tails of the tied knot or 12” if you’d like longer knot tails. This is the length of the bandana. For the width, measure from the neck to the point on the pet’s back you’d like the bandana to hit. For Harold, his neck measured 14” around, so the total length was 24” and the width was 12” wide.
2. Double the length of the fabric and fold lengthwise twice. Cut corner to corner. This will give you two bandana pieces of the same fabric. If you want different fabrics for the front and back, cut each piece individually.
3. Use a water soluble marker to write the name and stitch with 3 ply embroidery floss in a chain stitch on the top layer of fabric. Once you’re finished stitching, remove any remaining water soluble pen with a damp cloth.
4. Pin front-facing sides together. Stitch around the bandana with a .25” seam allowance leaving a 2” opening. Pull the bandana through to the front side, push the corners out and press.
5. Sew around the top of the bandana with a ⅛” seam allowance. Tie around the nearest puppy!
Originally posted on DesignSponge by Jessica Marquez
We love our HIVE pets and enjoy showering them with affection, even if they are not always as enthusiastic about it as we are (like when we dress them in tiny bandanas).
Here, we’ve shared a DIY bandana for both dogs and cats; with a special adaptation for cats to wear safely using a break-away collar (We wouldn’t trust a cat in a traditional bandana since they are troublemakers and could hurt themselves if it got snagged around their necks.)
Materials:
Break-away cat collar
Fabric, washed and pre-shrunk
Measuring tape
Scissors
Water soluble pen
Embroidery hoop
Embroidery floss
Sewing pins
Sewing thread
Image by Jessica Marquez
Image by Jessica Marquez


